# 1.域名添加SSL
HTTPS(超文本传输安全协议)中的证书是一种用于确保网站安全性和身份验证的重要组成部分。
HTTPS 协议通过在 HTTP 和传输层安全性协议(TLS)之间添加一层安全性来保护数据传输。
证书是 TLS 协议中的一部分,用于加密数据传输并验证服务器的身份。
HTTPS 证书通常包含以下信息:
公钥:证书包含一个公钥,用于加密在客户端和服务器之间传输的数据。这意味着只有服务器拥有与此公钥相关联的私钥,才能解密客户端发送的数据。
服务器信息:证书包含有关服务器的信息,包括服务器的域名(通常是网站的域名,如
www.example.com)以及证书的颁发者(通常是证书颁发机构)。数字签名:证书包含一个数字签名,用于验证证书的完整性和真实性。数字签名是由证书颁发机构使用其私钥生成的,客户端可以使用证书颁发机构的公钥来验证签名。
HTTPS 证书的工作原理如下:
当客户端(通常是
Web浏览器)连接到一个使用HTTPS的网站时,服务器会将其证书发送给客户端。客户端会验证证书的完整性,包括检查数字签名,以确保证书未被篡改并且来自可信任的证书颁发机构。
客户端使用从服务器证书中提取的公钥来加密一个称为"预主密钥"(
pre-master secret)的随机值,并将其发送回服务器。服务器使用其私钥来解密客户端发送的预主密钥。
服务器和客户端都使用共享的预主密钥来生成会话密钥,用于加密和解密后续的数据传输。
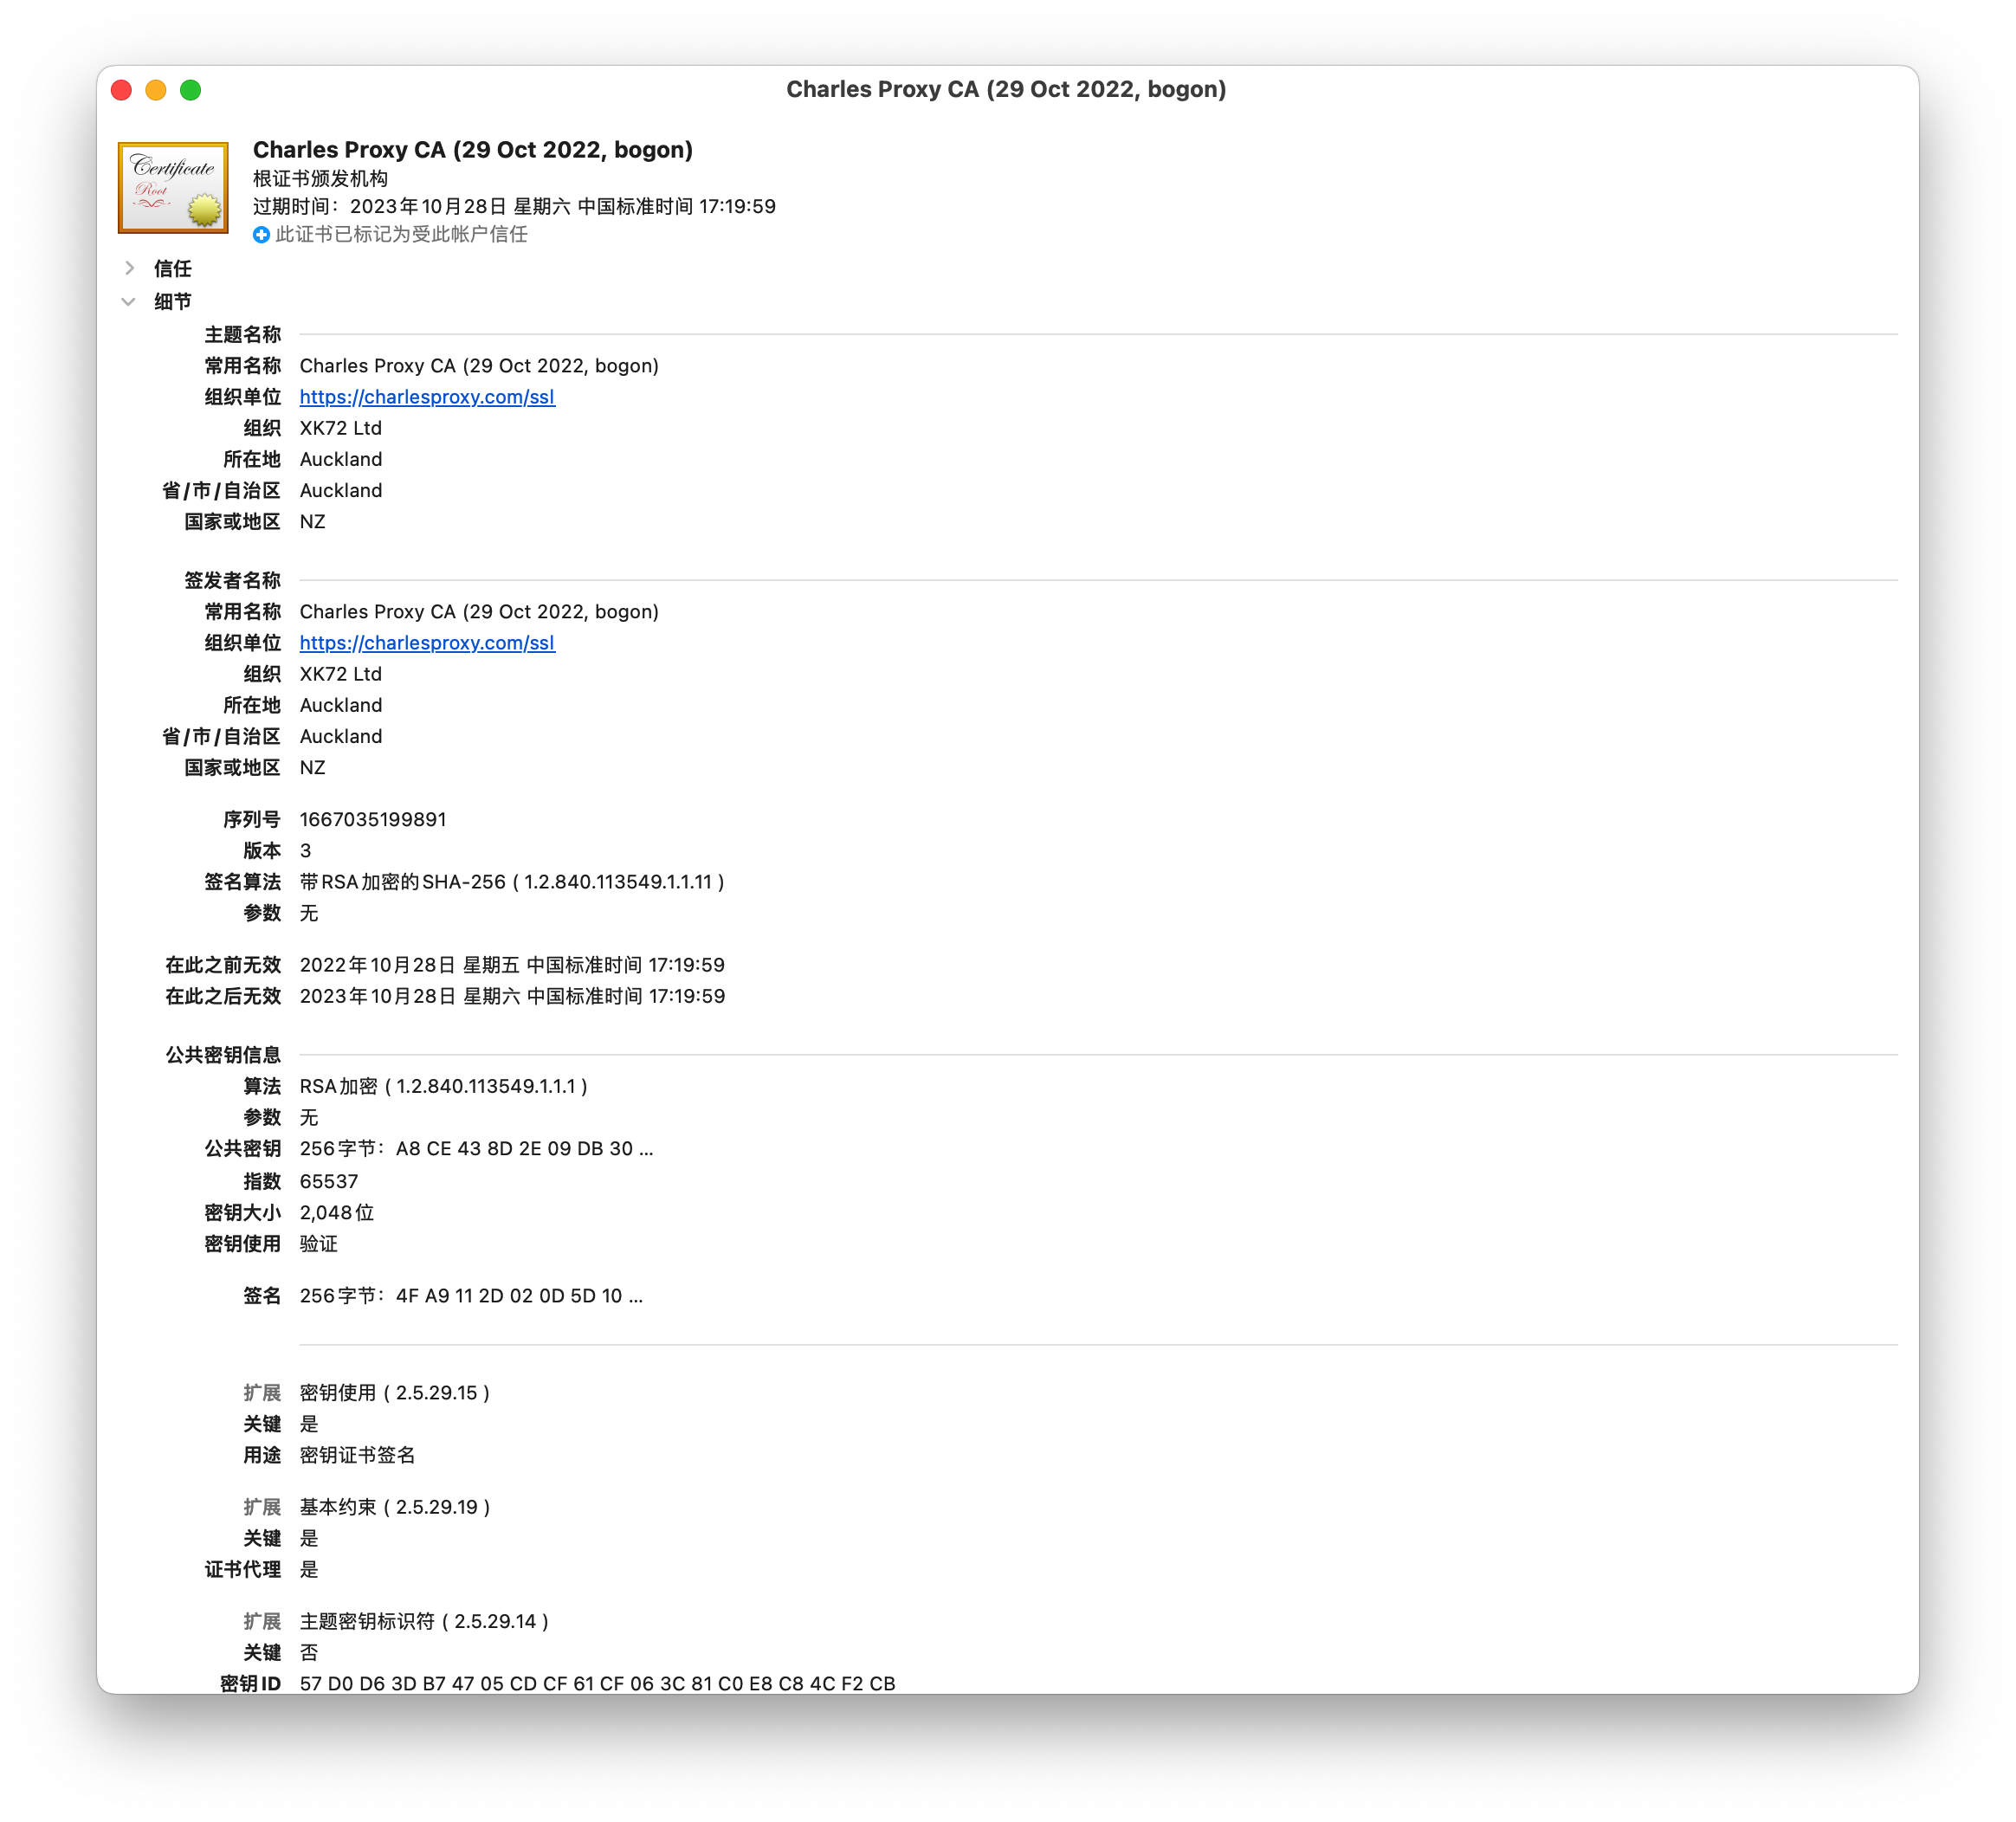
HTTPS 证书的作用是确保通信双方的数据保密性、完整性和身份验证。
它们为用户提供了信任和安全,因为用户可以通过证书验证网站的真实性,并确保他们与合法网站进行通信,而不是受到中间人攻击。
证书颁发机构是第三方实体,它们对网站的身份进行了验证,并签发了证书,这增强了用户对网站的信任。
# 1-1.freessl
先在freessl.cn上注册一个账号
然后在平台上添加目标域名:

下一步,会需要配置 DCV,即 Domain Control Verify:
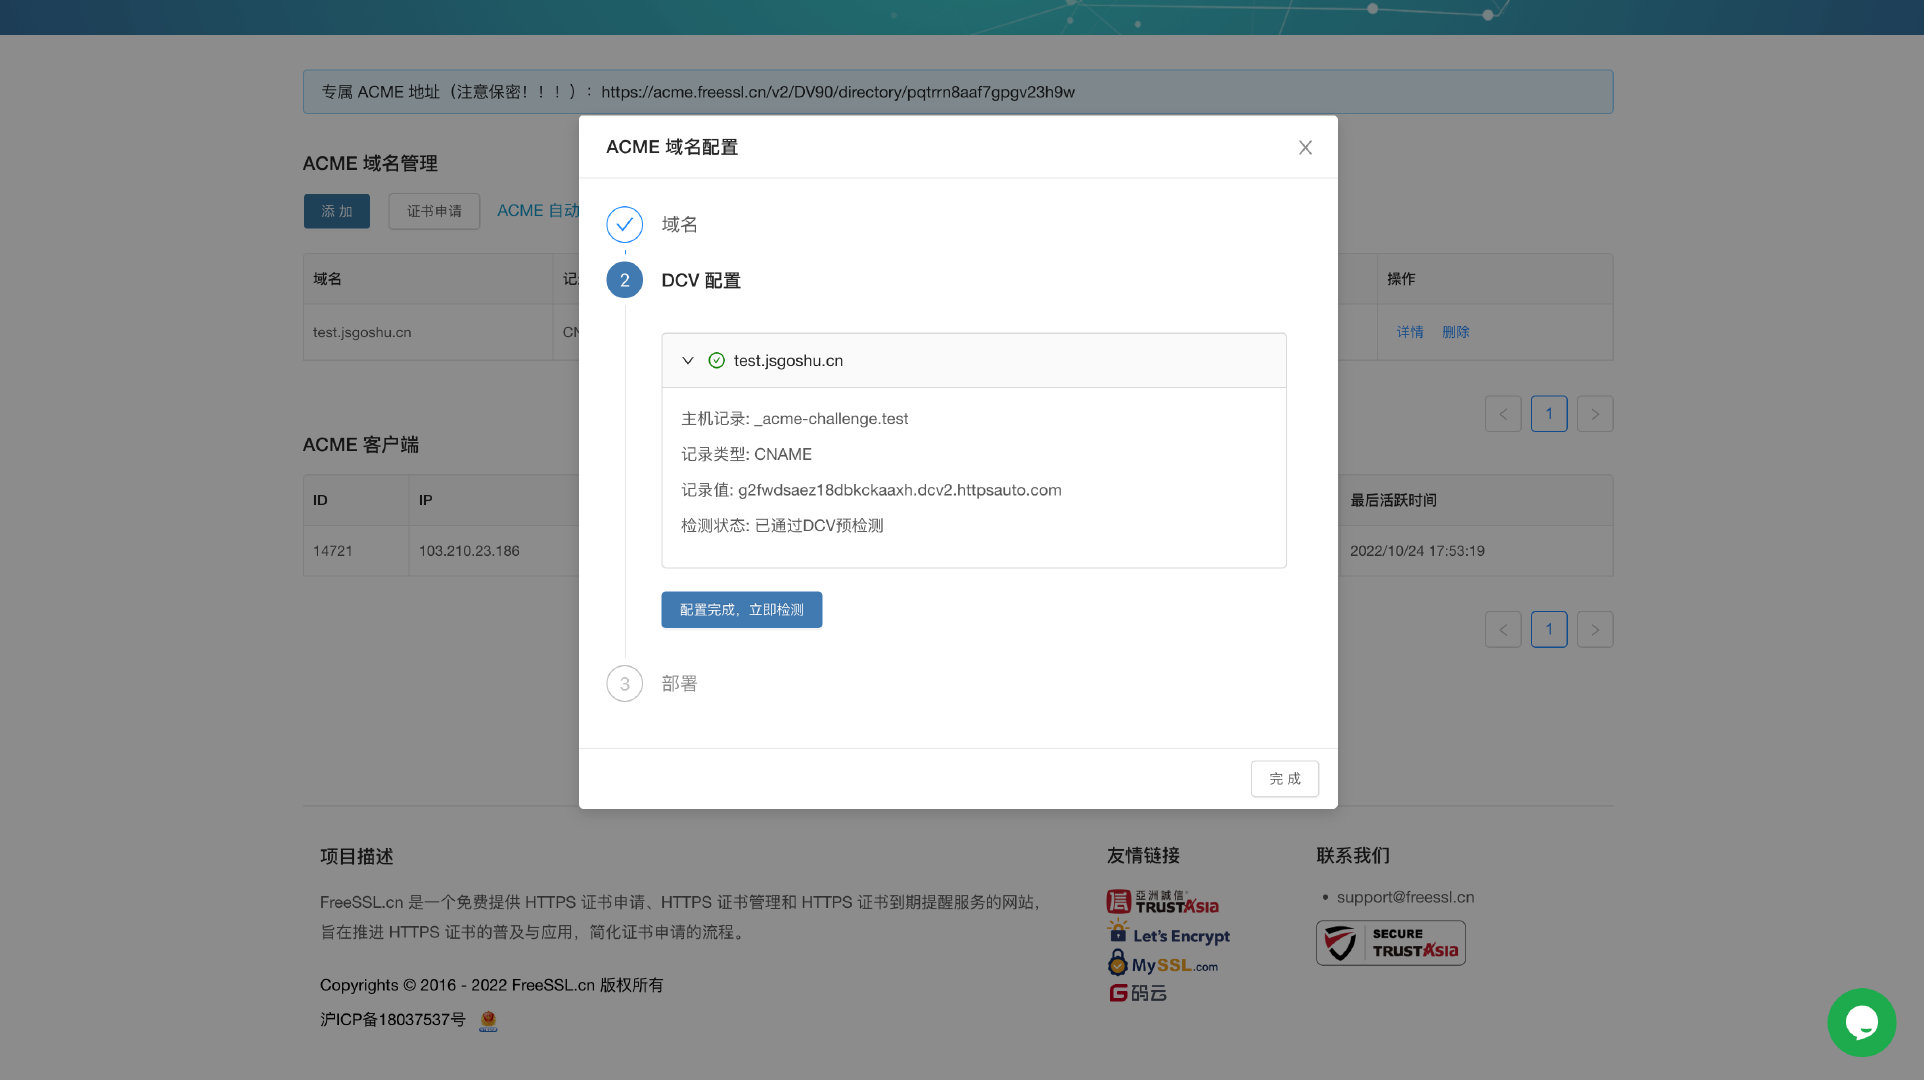
根据图中的记录,在域名控制台配置解析(以阿里云为例):

配置完成之后,会出现最后的部署代码:
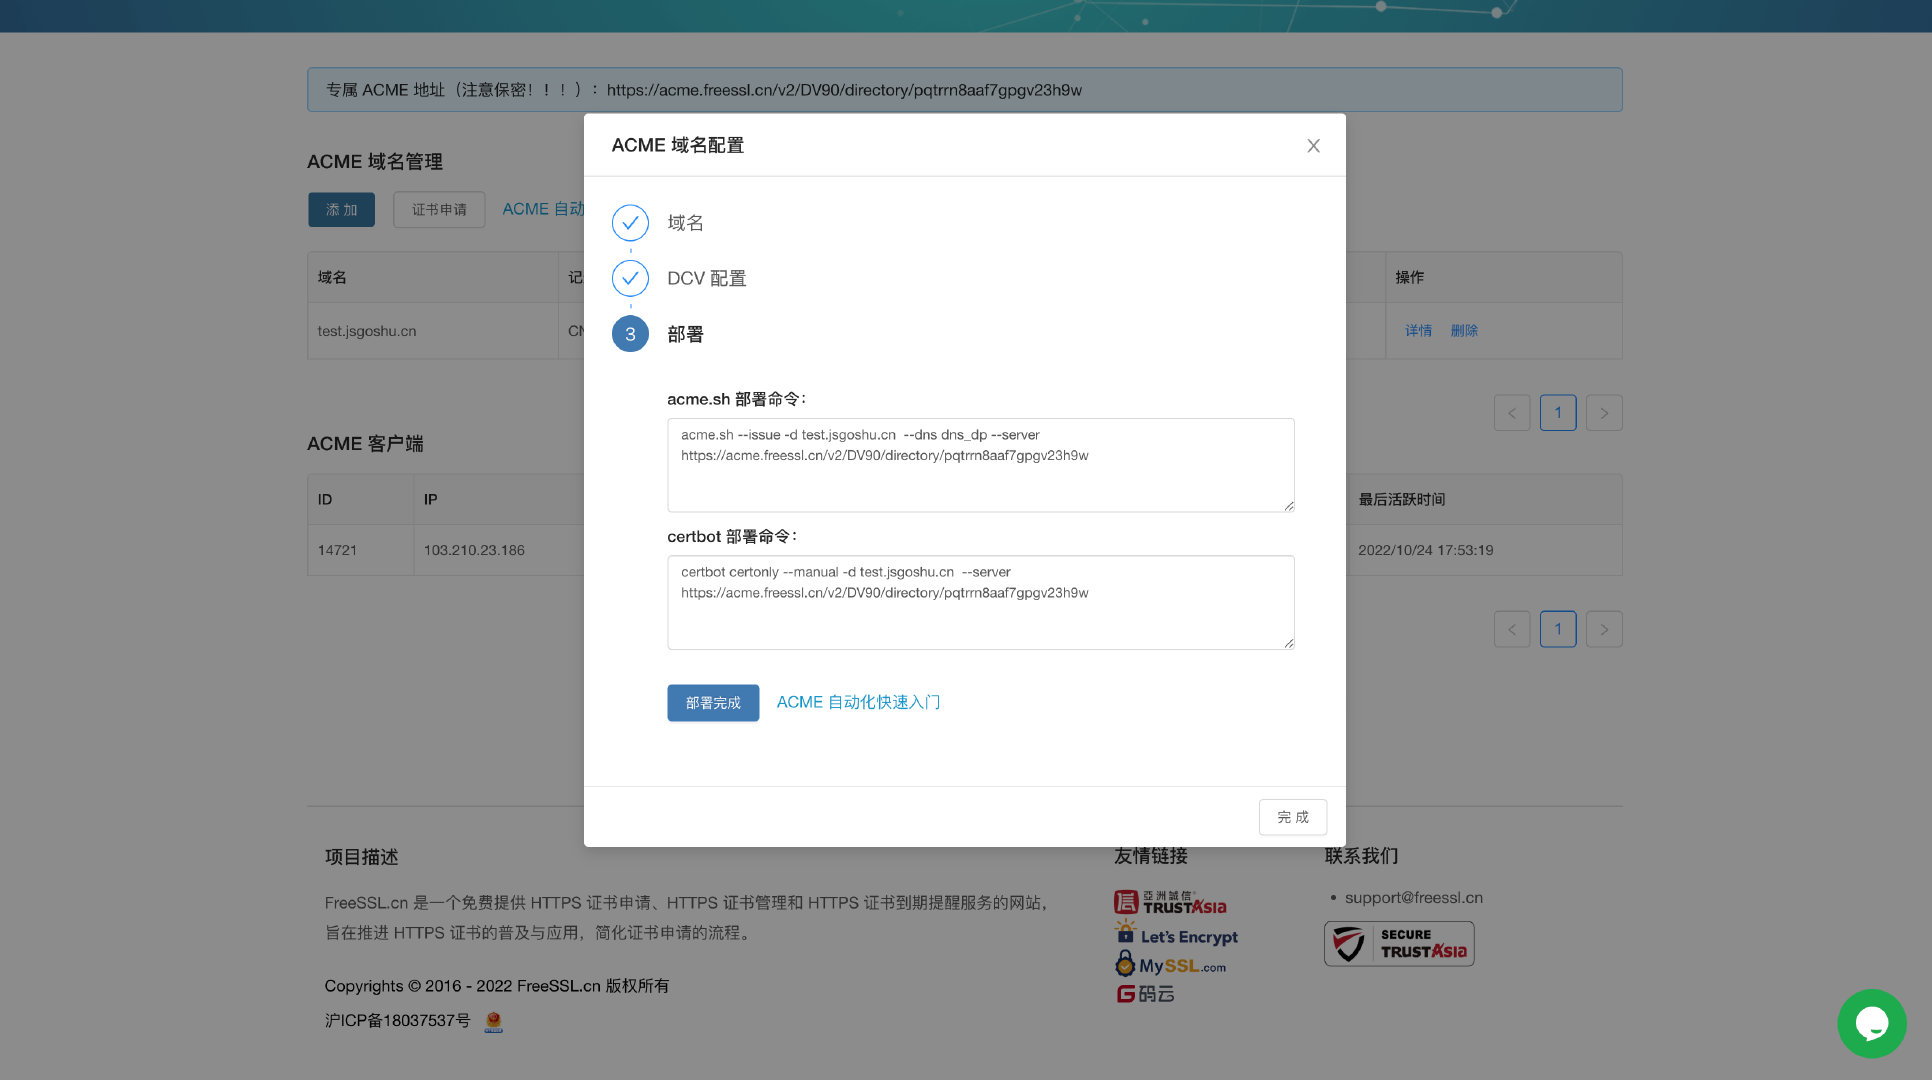
这里提供了两种方式 acme.sh 和 certbot。
# 1-2.acme.sh
我们以 acme.sh 为例,先在服务器上安装:
curl https://get.acme.sh | sh
TIP
理论上会自动添加一个 acme.sh 全局应用别名,但有时候会 command not found,需要手动执行 source ~/.bashrc 或 source ~/.bash_profile 后再继续。
也可以采用比较笨的方法:重新打开命令行(如果是 SSH,选择重新连接),以使 acme.sh 命令生效。
安装 acme.sh 完成后,在服务器上执行我们之前得到的语句:
acme.sh --issue -d test.jsgoshu.cn --dns dns_dp --server https://acme.freessl.cn/v2/DV90/directory/pqtrrn8aaf7gpgv23h9w
执行完成之后,控制台会打印出 cert 和 cert key 的安装信息:
Your cert is in: /root/.acme.sh/test.jsgoshu.cn/test.jsgoshu.cn.cer
Your cert key is in: /root/.acme.sh/test.jsgoshu.cn/test.jsgoshu.cn.key
The intermediate CA cert is in: /root/.acme.sh/test.jsgoshu.cn/ca.cer
And the full chain certs is there: /root/.acme.sh/test.jsgoshu.cn/fullchain.cer
2
3
4
# 1-3.配置nginx
接下来,就是配置托管服务器,以 nginx 为例:
在 http 模块下,新建一个 server 模块,监听 443 端口。与 80 端口的 server 监听模块是平级的。
然后修改对应的 ssl_certificate (证书)和 ssl_certificate_key (私钥)即可。
server {
  listen       443 ssl http2;
  listen       [::]:443 ssl http2;
  server_name  _;
  root         /usr/share/nginx/html;

  ssl_certificate "/root/.acme.sh/test.jsgoshu.cn/test.jsgoshu.cn.cer";
  ssl_certificate_key "/root/.acme.sh/test.jsgoshu.cn/test.jsgoshu.cn.key";
  ssl_session_cache shared:SSL:1m;
  ssl_session_timeout  10m;
  ssl_ciphers HIGH:!aNULL:!MD5;
  ssl_prefer_server_ciphers on;

  # Load configuration files for the default server block.
  include /etc/nginx/default.d/*.conf;

  error_page 404 /404.html;
      location = /40x.html {
  }

  error_page 500 502 503 504 /50x.html;
    location = /50x.html {
  }
}
2
3
4
5
6
7
8
9
10
11
12
13
14
15
16
17
18
19
20
21
22
23
24
# 1-4.http重定向
另外可以优化下 http 的重定向,以使用户在访问 http 协议的网站时,自动重定向到 https 协议:
server {
  listen       80;
  listen       [::]:80;
  server_name  _;
  root         /usr/share/nginx/html;
  # Load configuration files for the default server block.
  include /etc/nginx/default.d/*.conf;
  # 重定向到https
  return 301 https://test.jsgoshu.cn$request_uri;
}
2
3
4
5
6
7
8
9
10
最后需要使用 nginx -s reload 重启 nginx,配置即可生效。
参考文章:
ACME v2证书自动化快速入门 Let's encrypt 免费证书申请教程
# 2.webpack添加SSL
在本地的 webpack 服务上添加一个免费的 SSL 证书。
# 2-1.mkccert
首先,在电脑上安装 mkcert
# macOS
brew install mkcert
2
安装完成之后,Run "mkcert -install" for certificates to be trusted automatically.
即必须执行 mkcert --install 安装根证书。
这会使得我们后续安装的其他子证书在本机上自动的受信任。
TIP
这里的本机含义,指代的是,我们使用该节方式启动的 https 服务,只能在我们本机上访问。
同一内网下的机器,访问该 https 服务,依然是不受信任的、不安全的。
mkcert --install
安装完根证书之后,就可以安装子证书了。
- 在
webpack工程下任意创建一个目录,譬如https。 - 进入
https目录。 - 执行
mkcert example.com "*.example.com" example.test localhost 127.0.0.1 ::1。
以 localhost 为例:
mkdir https

cd https

mkcert localhost
2
3
4
5
TIP
创建子证书,可以使用自定义域名或者任意 IP 地址。
mkcert example.commkcert localhostmkcert 127.0.0.1
执行完之后,在 https 目录下会额外多俩文件 localhost-key.pem 和 localhost.pem。
# 2-2.配置webpack-dev-server
然后配置 webpack 中的 devServer 属性:
const fs = require('fs')
const path = require('path')

module.exports = {
  devServer: {
    host: 'localhost',
    port: '5000',
    https: {
      key: fs.readFileSync(path.resolve(__dirname, './https/localhost-key.pem')),
      cert: fs.readFileSync(path.resolve(__dirname, './https/localhost.pem'))
    }
  }
}
2
3
4
5
6
7
8
9
10
11
12
13
重启 webpack 服务,应用即可运行在 https:localhost:5000。